
It all starts with three things: a soft, workable dough, a ridiculously juicy filling packed with spices, and the art of the fold. That’s the heart of authentic Nepali momo. Bringing this taste of the Himalayas into your own kitchen is more than just cooking; it’s an experience from start to finish.
Your Journey to Perfect Homemade Momo
Ever bitten into a momo and wondered what makes it so dang good? It’s not just another dumpling. In Nepal, it’s a cultural icon, a food that brings people together. This guide is here to pull back the curtain and show you exactly how to capture that magic at home. We'll walk through everything—from getting the wrapper paper-thin but strong, to mixing a filling that bursts with flavor, and finally, mastering those beautiful, classic pleats.
This humble dumpling has won over food lovers far beyond Nepal. The global appetite for dumplings like momo is massive—the market was valued at an incredible USD 56.74 billion in 2023 and is expected to more than double to USD 122.13 billion by 2032. That’s a lot of dumplings! If you're curious about the numbers, you can dig into the details in this detailed dumplings market report.
Don't be intimidated. We're breaking this down into simple, manageable steps that make the process fun, not frustrating. Whether you've made dumplings a hundred times or this is your first attempt, you’ll end up with momo that could rival your favorite restaurant.
Just imagine serving up a plate of these, fresh from the steamer, alongside a classic dipping sauce.

That picture says it all—the delicate, almost see-through wrapper hugging a plump, savory filling. That’s what we’re aiming for.
What Makes Homemade Momo Special
There’s a certain satisfaction that comes from making momo from scratch. It connects you to the food in a way you just don't get with store-bought. In Nepali homes, it’s an art passed down through generations, and now it's your turn.
- Unbeatable Freshness: You simply can't top the taste of a momo steamed minutes after it was folded.
- Total Control: Want it spicier? A thicker wrapper? More ginger? You get to call all the shots.
- A Social Kitchen: Folding momo is the perfect excuse to gather friends or family around the table. It turns dinner prep into a party.
The real secret to incredible momo isn't a rare spice or a complicated technique. It’s the love and patience you pour into each step. Finding your rhythm while rolling, filling, and pleating becomes almost meditative, and I swear it makes them taste even better.
Think of this guide as your personal momo mentor. For more deep dives into Himalayan flavors and the stories behind them, be sure to explore our complete Nepali cuisine blog. We’ve got plenty of other traditional recipes waiting for you.
Alright, let's get our hands dirty and start crafting this amazing dish.
Crafting the Perfect Momo Dough
Let's get one thing straight: the secret to an incredible momo isn't just the filling. It all starts with the wrapper. You can have the most delicious filling in the world, but if the wrapper is tough or falls apart, the whole experience is ruined. That's why making your own dough is non-negotiable. Forget those store-bought wrappers; we're aiming for that authentic, delicate-yet-chewy texture that only comes from scratch. The goal is a dough that’s pliable enough to be rolled paper-thin but strong enough to hold a juicy, flavorful filling without a single tear.
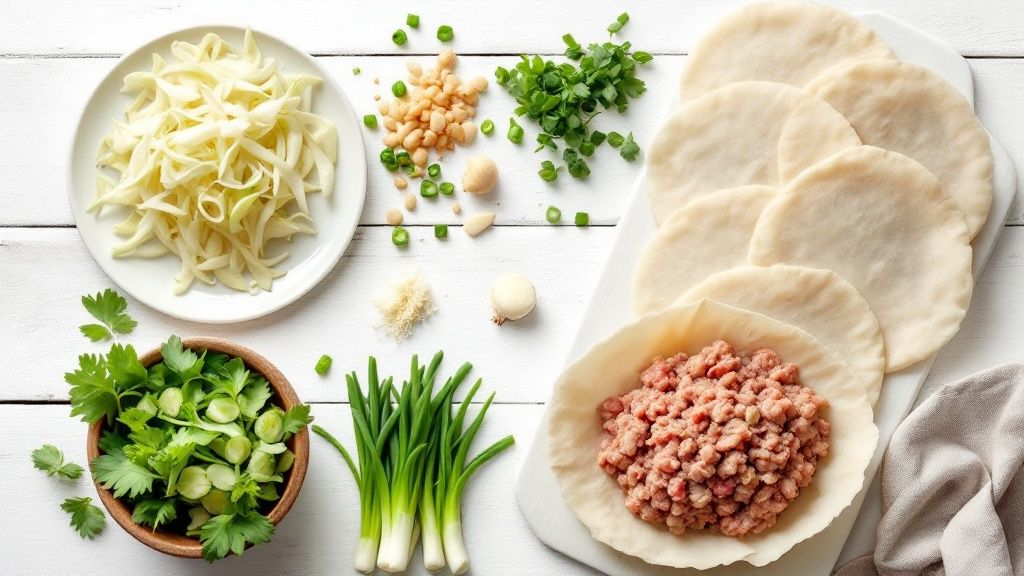
Don't worry, it's simpler than you think and only requires a handful of basic ingredients. The real trick is in the technique and getting the texture just right.
Getting the Ratios Right
Great momo dough is all about simplicity. You just need all-purpose flour, salt, a little oil, and water. Here's a quick rundown of what you'll need and why each component is so important.
Momo Dough Ingredients and Ratios
This table is your go-to reference for getting the dough perfect every time. These measurements are dialed in to produce a pliable, easy-to-work-with dough for about 40 momos.
| Ingredient | Quantity (for ~40 momos) | Purpose |
|---|---|---|
| All-Purpose Flour | 2 cups (approx. 250g) | This is the foundation, creating the gluten structure. |
| Salt | ½ teaspoon | It doesn't just add flavor; it strengthens the gluten. |
| Neutral Oil | 1 teaspoon | Makes the dough more pliable and easier to roll thin. |
| Warm Water | ¾ cup (approx. 180ml) | Hydrates the flour and gets the gluten working. |
With these simple ingredients, you're ready to start. The key is how you bring them together.
To start, mix the flour and salt together in a big bowl. Make a little well in the center and pour in the oil and about half of the warm water. Using warm water is a great little trick—it helps relax the gluten right from the start, which makes mixing a whole lot easier.
Now, slowly start pulling the flour in from the sides, adding the rest of the water bit by bit until a shaggy dough starts to form. The golden rule here is to never dump all the water in at once. You might not need it all. You're looking for a firm dough that isn't sticky. If it feels too wet, just add a tablespoon of flour. Too dry and crumbly? Add water one teaspoon at a time.
The Art of Kneading and Resting
Once your dough has come together, turn it out onto a lightly floured countertop. It's time to knead. This is where the magic happens. You’ll want to knead for a solid 8-10 minutes. You're not just mixing here; you're developing the gluten that gives the wrapper its signature elasticity and strength. Just push the dough away from you with the heel of your hand, fold it over, and repeat. You'll literally feel it transform from a lumpy ball into something smooth, supple, and almost satin-like.
A common mistake I see is under-kneading. A great way to test your dough is to press a finger into it. If the indentation slowly springs back, you're good to go. If it stays indented, keep kneading.
After all that hard work, the dough needs a break. Don't skip this part! Resting is absolutely critical for a couple of reasons:
- It relaxes the gluten. The intense gluten network you just built needs to chill out. If you try to roll it right away, it’ll be a rubbery nightmare that just snaps back at you.
- It ensures full hydration. Resting gives the flour time to absorb every last drop of water, which results in a much more uniform and workable texture.
Shape the dough into a ball, rub a thin layer of oil over it to keep it from drying out, and place it in a bowl. Cover it with a damp cloth or some plastic wrap and let it rest at room temperature for at least 30 minutes. If you have an hour, that’s even better. This patience will be rewarded with a silky-smooth dough that makes the rolling and folding process a breeze—exactly what you want when you’re learning how to make momo from the ground up.
Crafting a Juicy and Flavorful Filling
With your dough resting, it's time to turn our attention to the heart and soul of the momo: the filling. This is where the magic really happens. A great momo isn't just about the wrapper; it’s about that burst of savory, brothy goodness you get in the very first bite. A dry, crumbly filling is the biggest letdown, so let's make sure that doesn't happen.
We’re aiming for a filling that steams up perfectly, creating its own delicious broth inside that delicate dough pouch. I'll walk you through two classic options—a foolproof ground chicken filling and a surprisingly rich vegetarian version.
Building the Flavor Foundation
No matter if you're going with meat or veggies, the authentic taste of Nepali momo comes from a core trio of aromatics. Finely minced ginger, garlic, and a generous handful of fresh cilantro are absolutely essential. They form a bright, pungent base that just sings.
Beyond that fresh foundation, a few key spices do the heavy lifting. You'll almost always find:
- Cumin Powder: For that warm, earthy depth.
- Coriander Powder: Adds a light, almost citrusy note that plays perfectly with the fresh cilantro.
- Turmeric: Brings a subtle peppery flavor and a beautiful golden color.
- Black Pepper: For just the right amount of kick.
Some folks add a pinch of garam masala for a more complex aroma, but honestly, this simple blend is often all you need to nail that classic street-style flavor.
Here's the real secret to an incredibly juicy meat filling: fat. Always opt for ground chicken thigh with at least 15-20% fat. Lean breast meat will just dry out. As the momo steams, that fat renders and creates a self-basting effect, keeping every single bite moist and packed with flavor.
Classic Ground Chicken Filling
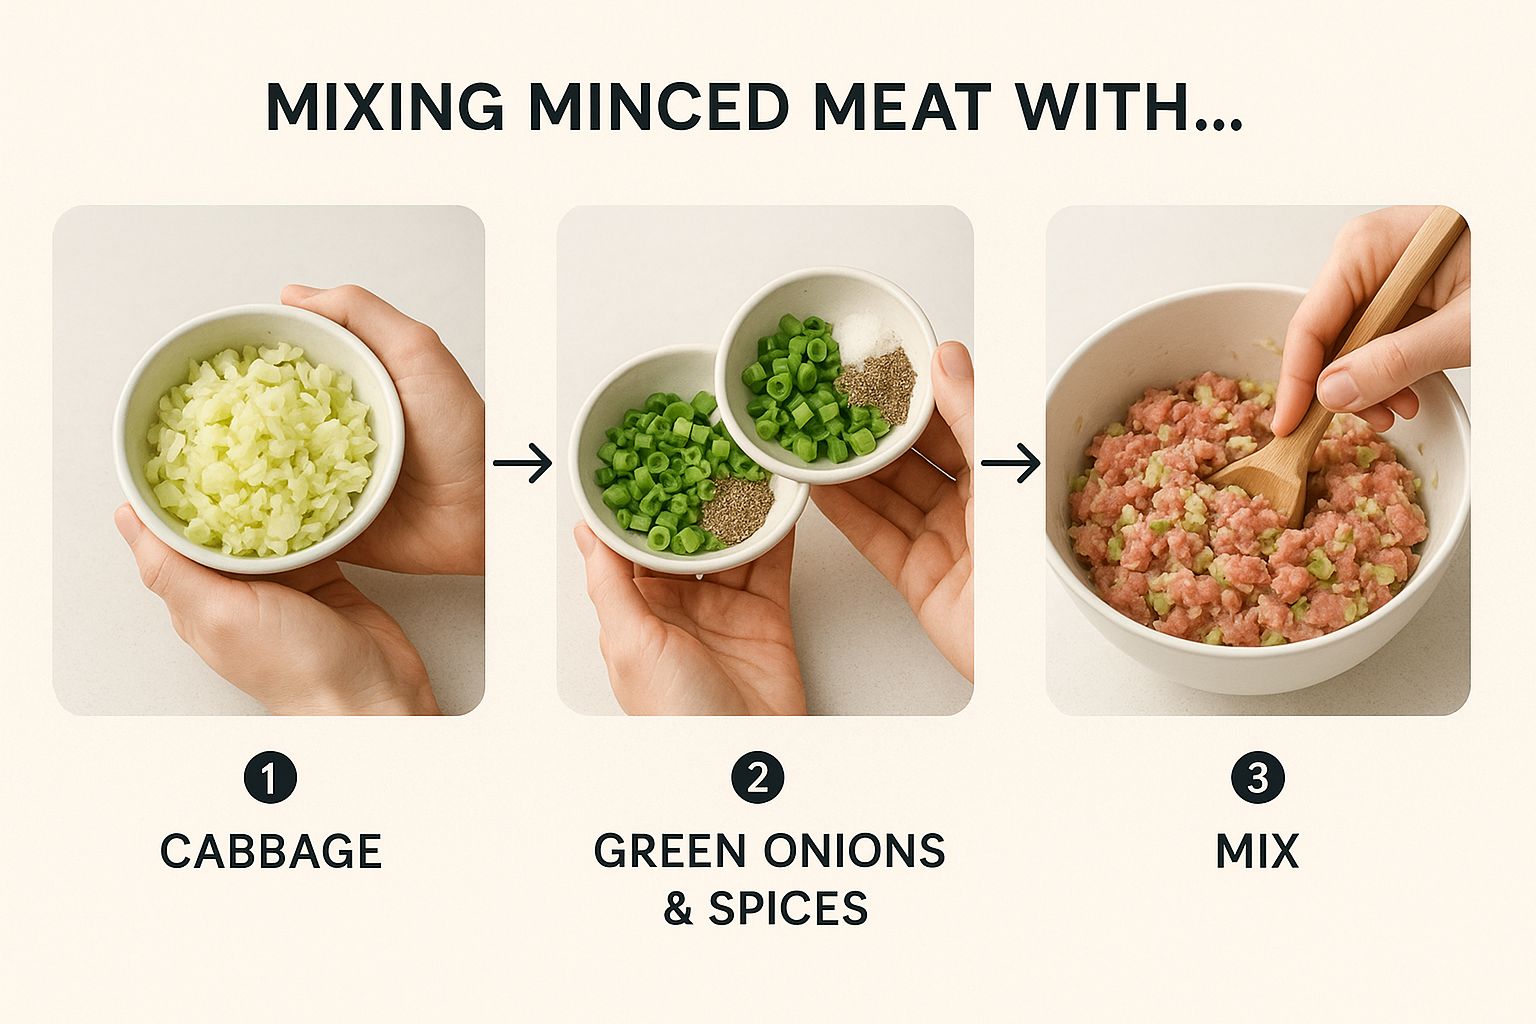
For that truly traditional taste, this ground chicken filling is your go-to. The process couldn't be simpler—just combine everything in a bowl and mix it well. I always use my hands for this part; it's the best way to get everything evenly distributed without turning the meat into a tough paste.
Here's a battle-tested recipe to get you started:
- Ground Chicken Thigh: About one pound.
- Finely Chopped Onion: One small one will do. It adds a touch of sweetness and crucial moisture.
- Aromatics: 1 tablespoon each of minced ginger and garlic, plus about a ¼ cup of chopped cilantro.
- Spices: 1 teaspoon of cumin, ½ teaspoon of turmeric, and a good pinch of black pepper.
- The Juiciness Secret: Add one tablespoon of melted unsalted butter. A splash of chicken broth works too. This little trick is an absolute game-changer.
Vibrant Vegetarian Filling
Making a fantastic vegetarian momo that's still juicy takes a bit of a different strategy. The main hurdle is getting rid of excess water from the vegetables, which can lead to a soggy filling and, even worse, a torn wrapper.
First, finely chop or grate your veggies—cabbage, carrots, and onions are a classic combination. Toss them in a bowl with a generous sprinkle of salt and let them sit for about 15-20 minutes. This is key, as the salt will pull out a surprising amount of water.
Next, bundle the salted veggies in a clean kitchen towel or some cheesecloth and squeeze. I mean really squeeze. You want to get as much liquid out as you possibly can. Don't skip this!
Once you’ve got a dry-ish vegetable base, you’re ready to add your ginger, garlic, cilantro, and spices. From here, you can get creative by mixing in crumbled paneer, firm tofu, or finely chopped mushrooms for a more "meaty" texture. The best Nepali restaurants have their own signature veggie blends, and you can find tons of inspiration by checking out menus like the MomoMandu menu to see what combinations they use.
The Art of Folding and Shaping Momos
This is where the magic really happens—transforming simple dough and filling into a beautiful, handcrafted dumpling. Folding momos can look a bit tricky at first, but once you get into the rhythm, it becomes an incredibly relaxing, almost meditative process. The goal is to turn that rested, pliable dough into thin, uniform wrappers that are ready to cradle that delicious filling.
First things first, let's get those wrappers ready. Grab your ball of rested dough and slice it into two equal halves. Take each half and roll it out into a long, even log, about an inch thick. From there, slice off small, uniform pieces, each about the size of a gumball.
A little tip I learned the hard way: keep the pieces you aren't working with covered by a damp cloth. If you don't, they'll dry out fast, making them impossible to roll and fold properly. It’s a small step, but it makes a world of difference.
Working one piece at a time, roll it into a small ball and then flatten it with the palm of your hand. On a lightly floured surface, use a small rolling pin to roll it into a circle about 3 to 4 inches across.
The real secret to a perfect wrapper is rolling the edges thinner than the center. This little trick ensures the pleated top doesn't end up being a mouthful of dough, while the base stays sturdy enough to hold all that juicy filling without tearing.
Mastering Two Classic Folds
Once your wrappers are rolled, it's time for the fun part. I find it helps to set up a little assembly line: your stack of wrappers, a small bowl of water for sealing, and your bowl of filling, all within easy reach. This is how restaurants can pump out hundreds of perfect momos, and the same logic works great in a home kitchen.
While folding is a true art form, it's interesting to see how technology is changing the game on a commercial scale. The global market for dumpling-making machines hit USD 142.7 million in 2024, as automation takes over the tedious tasks of forming and crimping to keep up with massive demand. If you're curious about how technology is influencing dumpling production, you can check out the latest market insights on dumpling making machines.
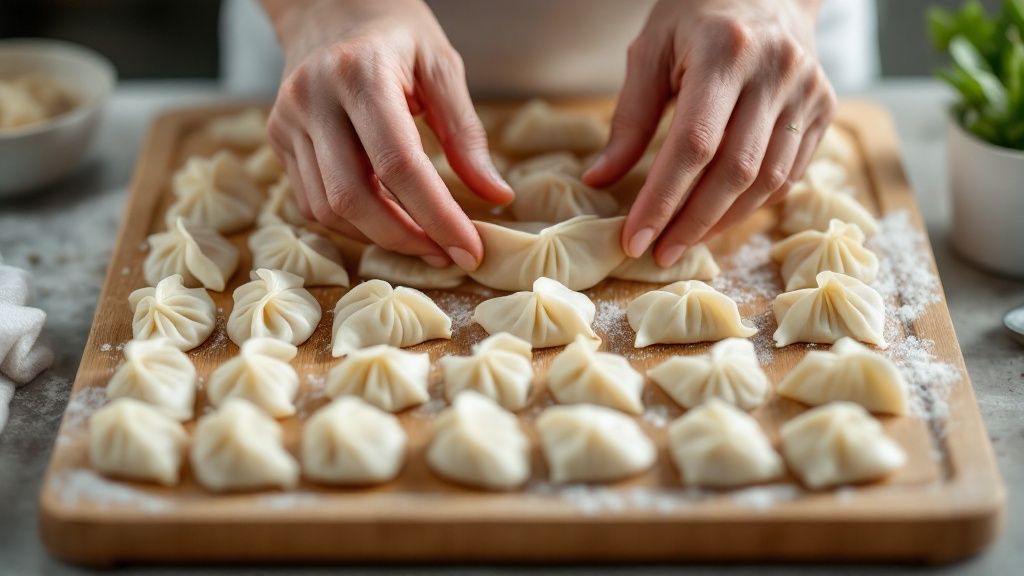
The Beginner-Friendly Half-Moon
If you're new to making momos, this is the perfect place to start. It’s quick, straightforward, and gives you a perfect seal every time.
- Spoon about a tablespoon of filling right into the center of the wrapper.
- Dip your fingertip in water and lightly moisten one half of the wrapper's edge.
- Fold the dry half over the filling to meet the wet edge, creating a simple semi-circle.
- Press the edges together firmly to seal them tight. For a little extra flair, you can crimp the edge with a fork.
The Iconic Round Pouch
This is that classic, professional-looking momo you see everywhere, with the beautiful pleated top. It definitely takes a bit more practice, but it's so satisfying once you nail it.
- Hold a wrapper flat in your non-dominant hand and add the filling.
- With your dominant hand, use your thumb and index finger to create a small pleat along the edge.
- Keep making small, overlapping pleats all the way around, rotating the momo in your hand as you go.
- Once you've come full circle, gather all the pleats at the top and give them a final pinch and twist to seal everything up.
Troubleshooting Common Folding Issues
Don't sweat it if your first few attempts look a little wonky. Everyone starts somewhere! Here are a few common hiccups and how to fix them:
- Tearing Wrappers: This is usually a sign of one of two things: you've overstuffed it, or the wrapper is too thin. Try using a little less filling or remember to leave the center of the wrapper slightly thicker when you roll it out.
- A Poor Seal: If your momos burst open while steaming, the edges were probably too dry or got some filling on them. A tiny bit of water on the rim creates a much stronger seal, and always wipe away any stray bits of filling from the edges before you fold.
- Sticky Dough: Is the dough sticking to everything? It's likely a bit too wet. Just keep your hands and your work surface lightly floured and you should be good to go.
Cooking Your Momos to Perfection
You've done the hard work of filling and folding, and now it's time for the final, most rewarding step. Cooking these little parcels is where the magic really happens. The classic, time-honored way to cook momos is by steaming them. This gentle heat coaxes the wrappers into a tender, almost translucent state while perfectly locking in all the juices from the filling inside.
Getting your steamer ready is straightforward, whether you're using a traditional bamboo basket or a modern metal insert. The biggest trick of the trade is to stop the momos from sticking. The most authentic and, in my opinion, best way to do this is by lining the steamer trays with fresh cabbage leaves. Not only does this create a perfect non-stick surface, but it also infuses the momos with a subtle, sweet fragrance as they cook.
The Steaming Process
Lay your momos out over the cabbage leaves, but don't crowd them. Make sure to leave about an inch of space between each one, because they'll puff up a bit and you don't want them to fuse together.
Get a pot or wok that your steamer can sit securely on and bring a couple of inches of water to a good, rolling boil.
Carefully place the steamer over the boiling water, pop the lid on, and let the steam do its thing. For fresh, unfrozen momos, you're looking at a cook time of about 10 to 12 minutes.
You'll know they're done when the wrappers take on a slightly see-through, glossy look. If you give one a gentle poke, it should feel firm and springy, not doughy or sticky.
My grandmother always told me to look for the "sheen." A perfectly cooked momo will have a beautiful, delicate gloss to it. If the wrapper still looks dull or floury, just give it another minute or two.
Exploring Delicious Variations
Steaming is the quintessential way to prepare momo, but it’s certainly not the only one. Once you've mastered the basic steamed version, you can start playing with other popular styles you’d find all over Nepal, like Kothey and C-Momo.
Kothey Momo (Pan-Fried): This style gives you the best of both worlds—a delightfully crispy, golden-brown bottom with a soft, steamed top. You just pan-fry the momos in a bit of oil, and once the bottoms are crisp, you add a splash of water, cover the pan tightly, and let them steam until cooked through.
C-Momo (Chili Momo): If you're a fan of spicy food, you have to try this. It's a hugely popular street-food dish where steamed momos are tossed in a fiery, tangy chili gravy. It's an explosion of flavor.
Of course, no momo is truly complete without its dipping sauce, or achar. The most common one is a simple but incredibly flavorful tomato-based achar. Just blend some roasted tomatoes, a garlic clove, a green chili, and a small handful of cilantro with a pinch of salt. This fresh, zesty sauce cuts through the richness of the momo and ties the whole experience together.
Common Questions About Making Momo
Even after you get the hang of folding, a few questions always seem to pop up. Knowing the answers ahead of time can make the whole process feel less intimidating and save you from some common frustrations. Let's tackle the most frequent challenges that come up when you're learning the ropes.
One of the first things people ask is about prepping in advance. Can you make the dough ahead of time? Absolutely. In fact, I often find it works out even better that way.
After kneading, just wrap the dough ball tightly in plastic wrap and stick it in the fridge. It’ll be good for up to 24 hours. This little rest period lets the gluten relax completely, making the dough incredibly pliable and easy to roll out later. Just be sure to pull it out and let it sit at room temperature for about 30 minutes before you start working with it.
Storing and Troubleshooting
So, what about storing the momos once they’re assembled but not cooked? This is where your freezer becomes your best friend. It’s the perfect trick for having homemade momo ready at a moment’s notice.
- Freezing: Arrange the freshly folded momos on a baking sheet lined with parchment paper. The key is to make sure they aren’t touching, or they'll stick together. Pop the whole tray in the freezer for an hour or two until they're frozen solid.
- Storing: Once they're rock hard, you can transfer them into a freezer-safe bag or container. They'll keep beautifully for up to two months.
- Cooking from Frozen: And the best part? No need to thaw. Steam them directly from the freezer—just add an extra 4-5 minutes to your usual cooking time.
A common complaint I hear is about dry filling, especially with chicken. This almost always happens when you use super lean meat. For juicy, flavorful momos, always choose ground chicken thigh over breast. If you want an extra guarantee of juiciness, add a tiny pat of butter or a splash of broth to your filling mixture. It makes a world of difference.
If you find your wrappers are tearing, you're likely either rolling them a bit too thin or getting a little too generous with the filling. You're aiming for a wrapper that's translucent but not totally see-through. Try to keep the center just slightly thicker than the edges to give it more strength.
Of course, sometimes life just gets in the way and you crave that authentic flavor without the work. If you're in the Triangle area, you can always check out where our food truck is and order a pickup for some fresh, handcrafted momo.
Article created using Outrank